WithSecure Cloud Protection for Salesforce safeguards your Salesforce users against phishing attempts in real-time. The solution provides an URL Protection feature. Both at the time of upload and when a user clicks on a link, URLs are scanned, keeping your Salesforce users safe from opening phishing links and accessing harmful websites. The security feature covers both Salesforce standard and custom objects and fields.
URL scanning capabilities for custom objects and fields can be configured directly from the UI starting from version Orion 2.5. Follow these detailed steps to enable or disable URL scanning for standard and custom objects using the UI.
1. Create a custom object: Use the Object Manager to create a custom object and add the required fields. Note that only text and URL fields support URL scanning.
2. Configure URL scanning:
Go to the App Launcher and open Cloud Protection.
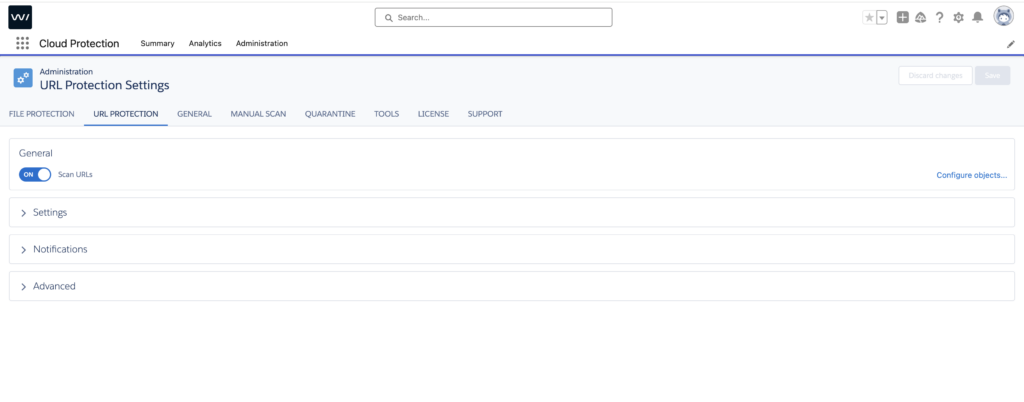
Navigate to Administration > URL Protection.
Go to Scan URL Configure Objects (URL Protection -> General -> Configure Objects).
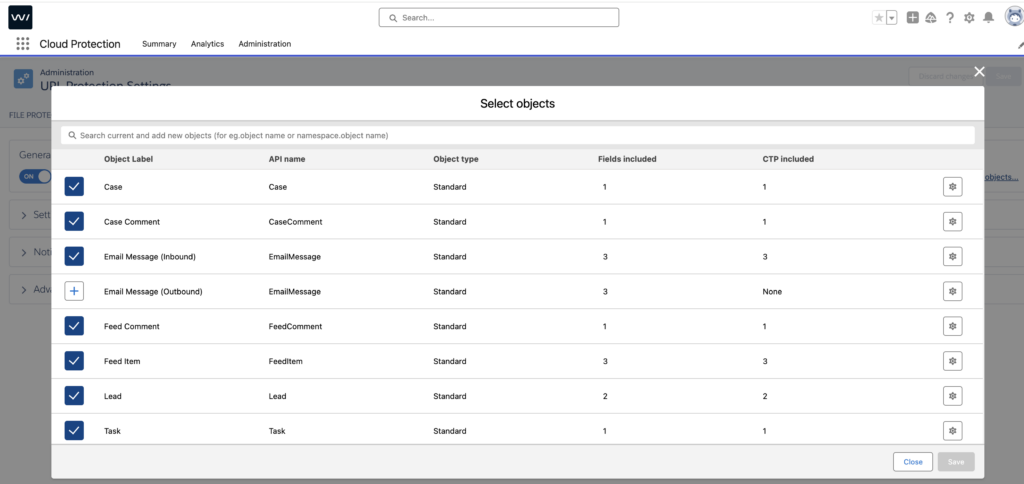
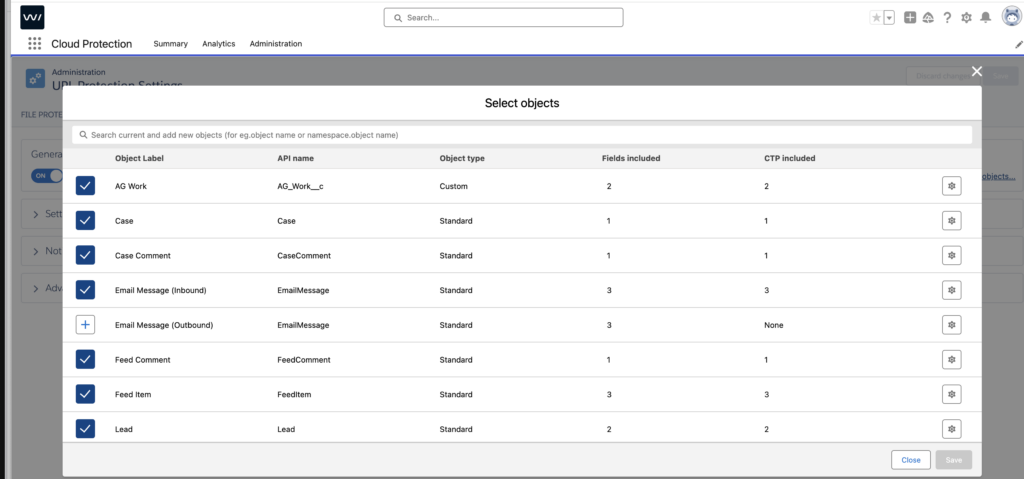
3. Select object modal: This modal is designed to support all custom and standard objects existing in the organization. By default, all standard objects and their fields are selected.
Note that we are moving Click Time Protection (CTP) enablement/disablement (URL Protection -> Settings -> Replace URLs with click-time protection links) to the Scan URL Configure Objects (URL Protection -> General -> Configure Objects).
Note that users cannot disable/enable scanning on a single object for email inbound or outbound but instead, it is available as two different objects i.e., EmailMessage (Inbound) and EmailMessage (Outbound).
All standard and custom objects and their fields, Click-time protection settings are migrated to Orion 2.5 from the older version as per the configured settings.
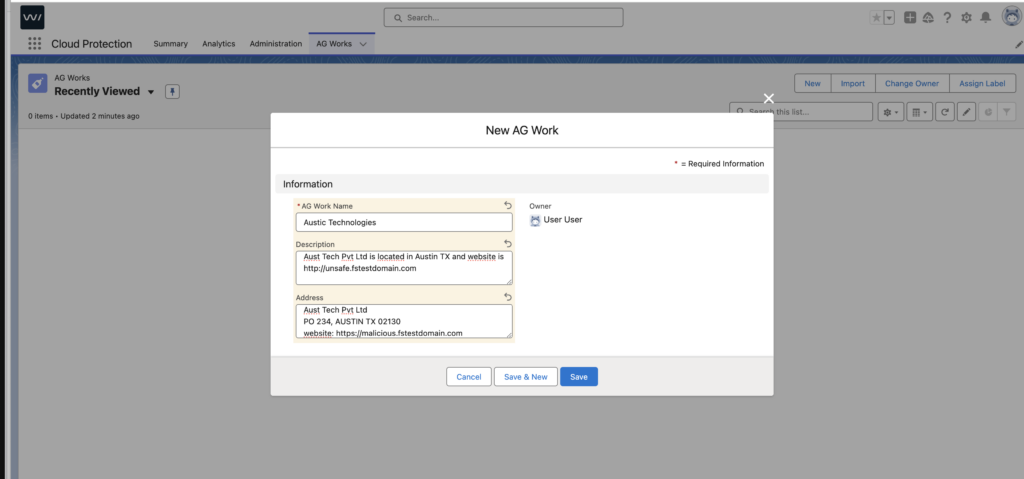
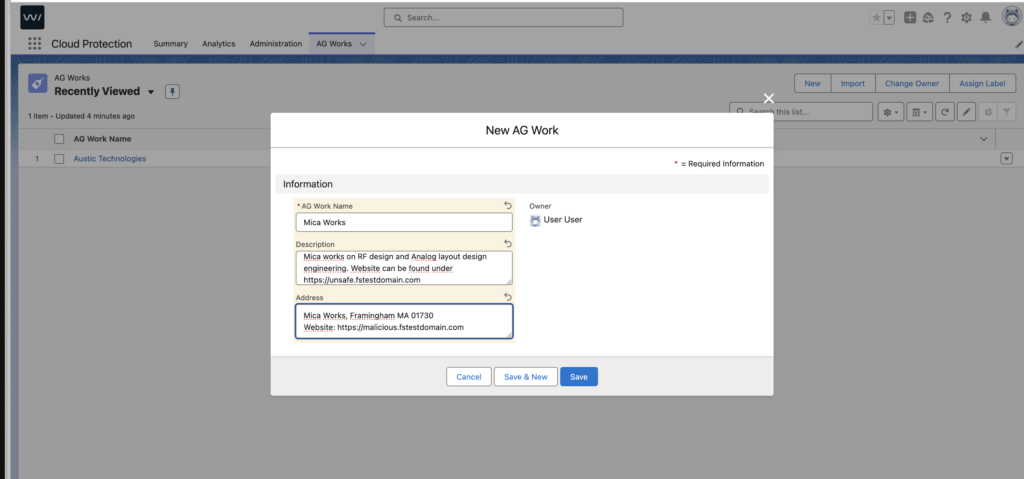
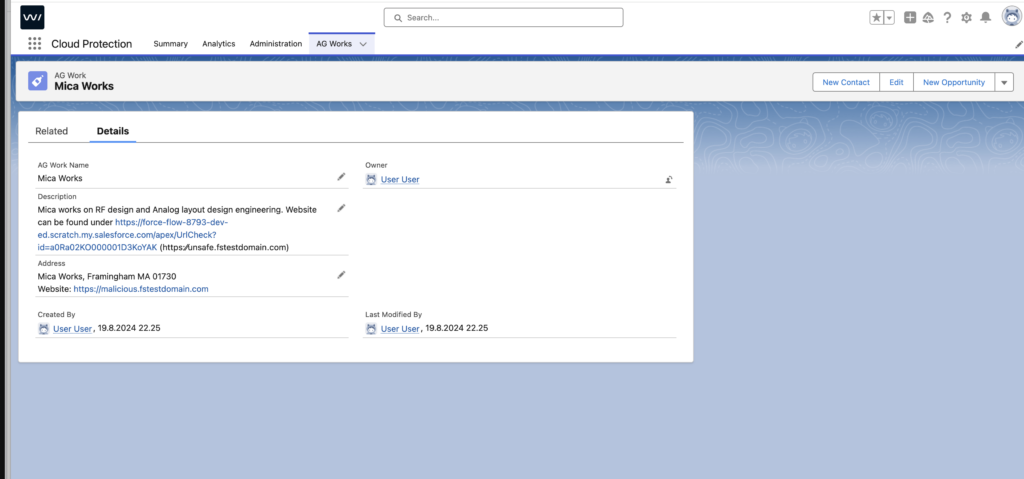
4. Search for objects: In the search bar, type the name of the desired standard/custom objects to enable scanning URL. For example, search for a custom object named “AG Work”.
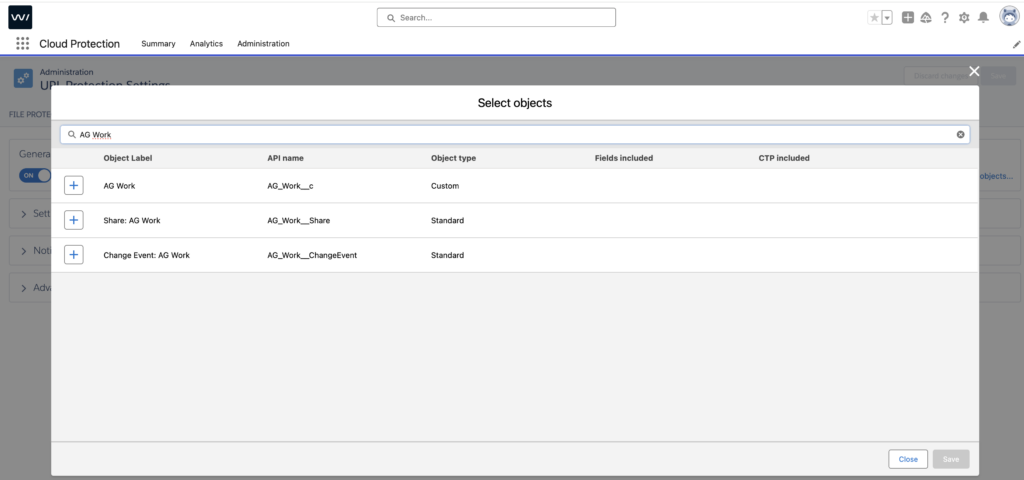
5. Select the desired custom objects to enable scanning URL.
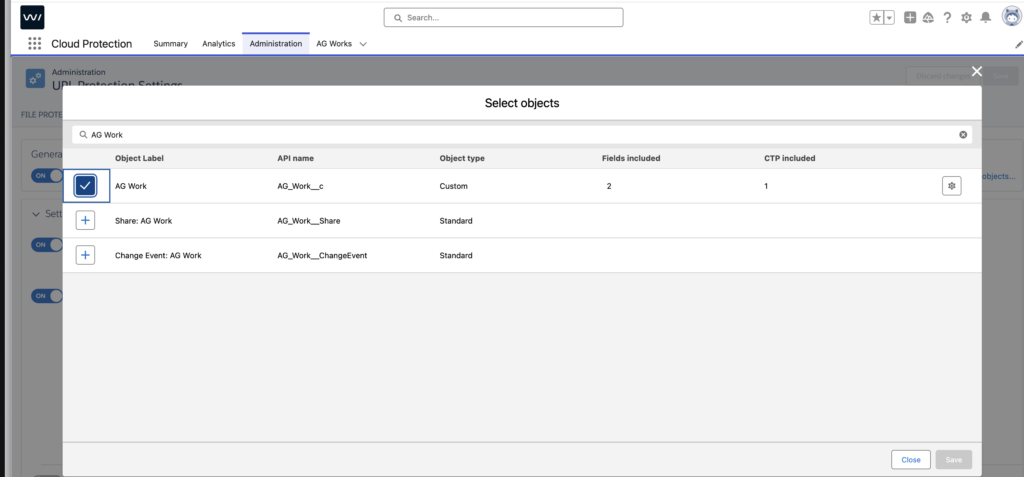
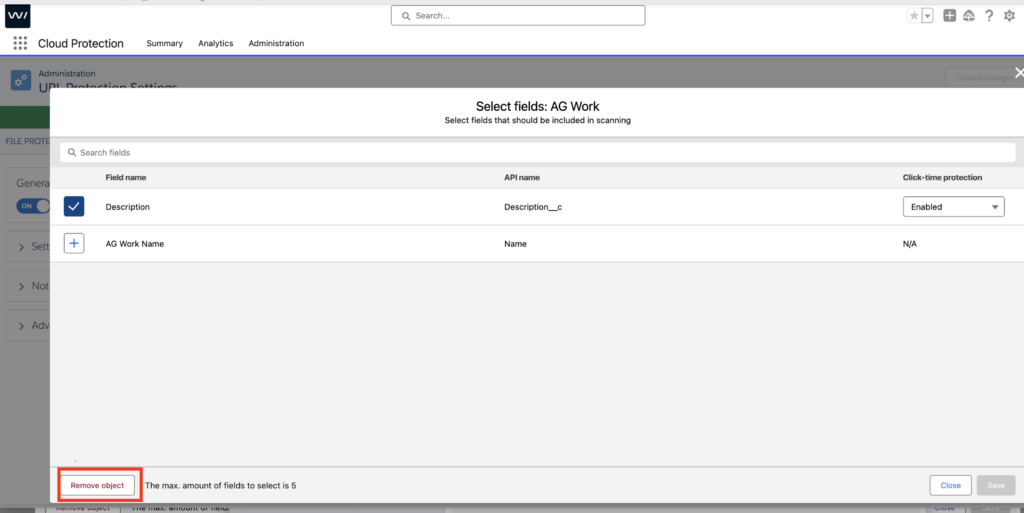
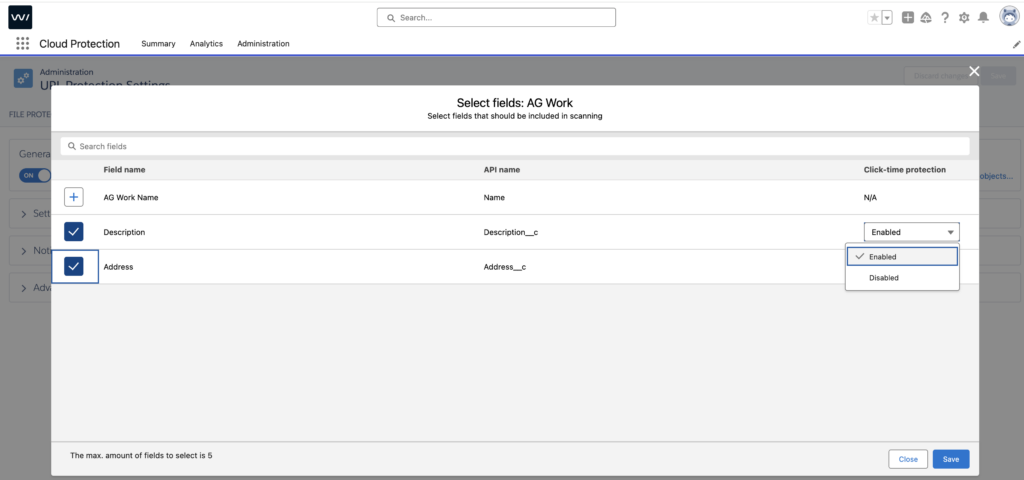
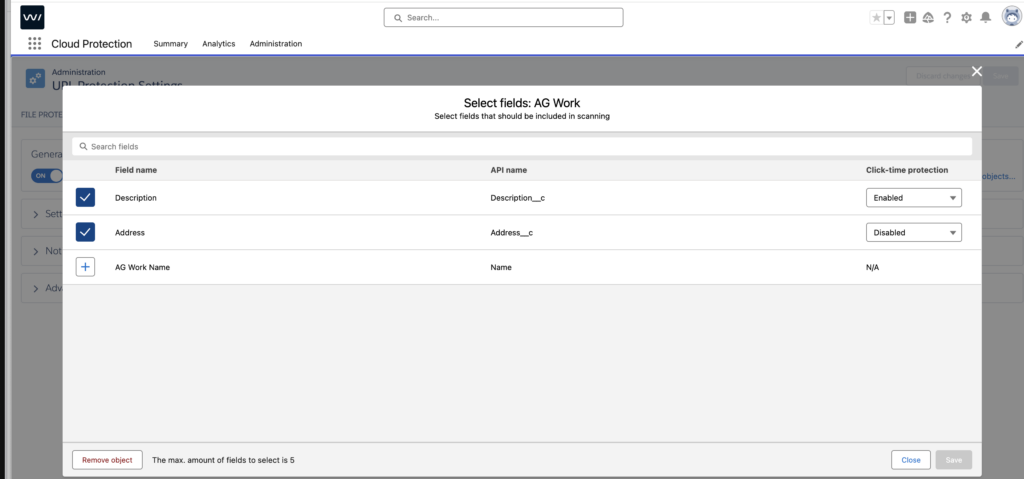
6. Configure fields for scanning: Once the desired custom object is selected for URL scanning, press the gear icon to select the desired fields to enable URL scanning and enable/disable Click-time protection for the selected fields. Note that the maximum number of fields to select is 5.
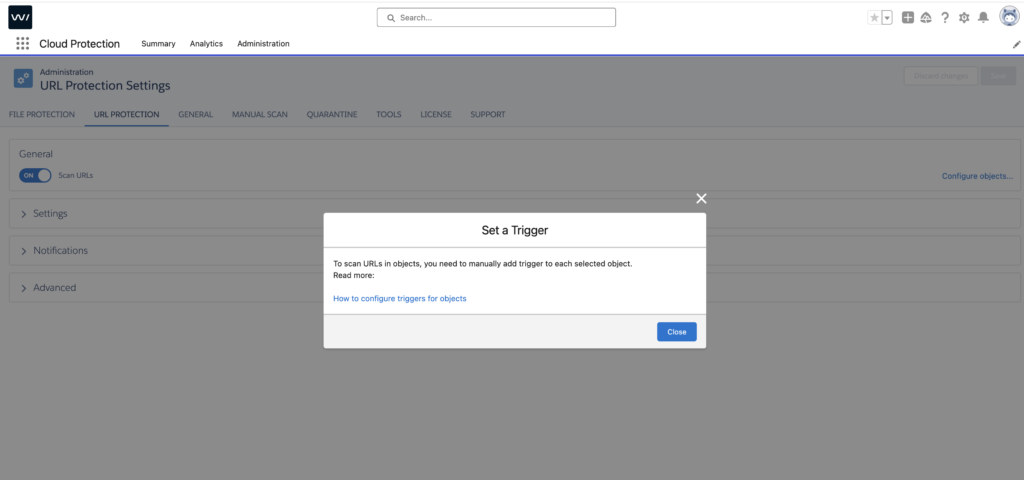
7. Save configurations: After selecting the desired fields, press the save button. This will prompt a window to enable triggers with a link to the knowledge base article “How to configure triggers for objects?”. Please refer to this article to set up triggers for the objects.
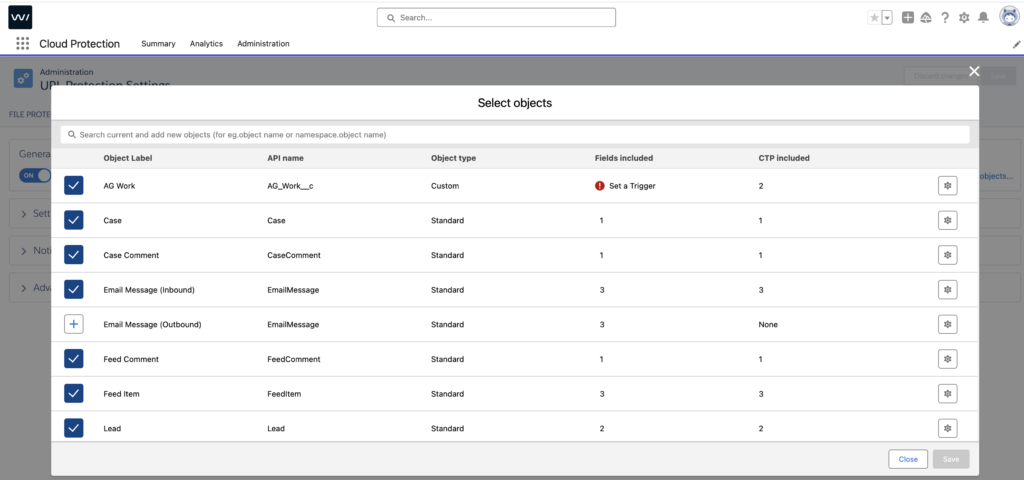
8. Check trigger status: The main Select Object modal will reflect the trigger status as “Set a Trigger” if the trigger is not yet configured.
9. Run the trigger: In the Object Manager, run the trigger for the selected object.
10. Additional trigger setup: Run the trigger for the selected objects as per the steps below.
Note: The package includes the trigger for the following standard objects: Case, CaseComment, Lead, Task, EmailMessage, FeedItem, FeedComment. There is no need to create triggers for the above objects. If another Standard object or a Custom object needs to be configured, ensure that a trigger does not already exist for the configured object.
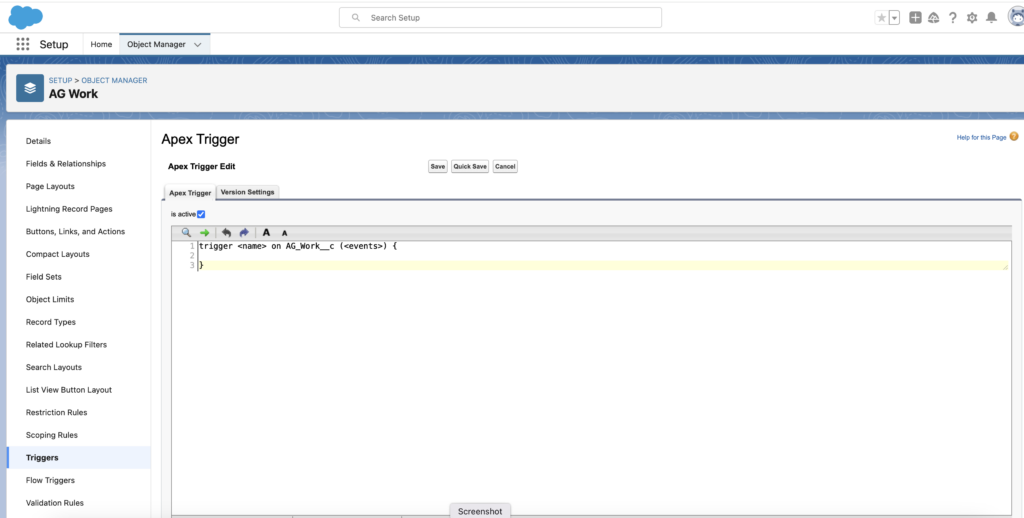
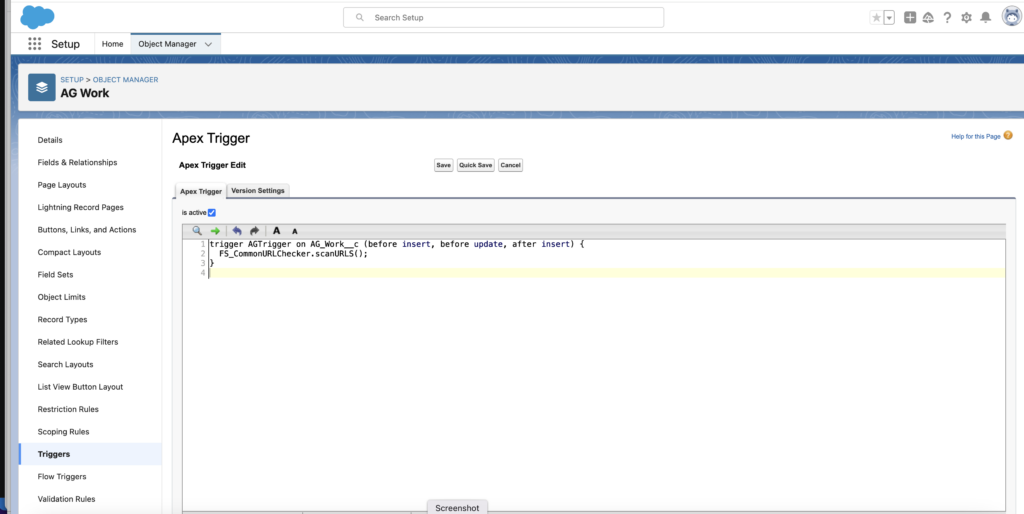
Create Apex triggers as follows:
Navigate to the “Triggers” section of the object setup page.
Create a new trigger.
Paste the following code and change sections in brackets (“[ ]“), according to the object details:
[TRIGGERNAME] suggestions:Standard Objects: Object API name + “Trigger“Custom Objects: Object API name without “__c“ + “Trigger“But the trigger name can be any unique name.[OBJECTAPINAME]: As obtained according to the above section.Example: Account, Department__c
trigger [TRIGGERNAME] on [OBJECTAPINAME] (before insert, before update, after insert) { AFSC.FS_CommonURLChecker.scanURLS(); }
Save the trigger.
Create a test class: To ensure your trigger code is covered, you’ll need to create a test class. Start by inserting an object record in the test method. Remember to account for any required fields and validation rules. For detailed guidance, refer to our document on “How to Create a Test Class“.
Testing and deployment: After validating the functionality in the sandbox environment, both the trigger and the test class should be deployed to the production environment. This can be done using Change Sets or other preferred deployment methods. Note that it is not necessary to run AFSC package test classes during this deployment.
Alternative deployment options: If you’re not using a sandbox organization, you can also deploy using metadata files of the trigger and test class through an alternative deployment method.
Additional resources: For more information on Salesforce deployments and selecting the right tools for your development and deployment needs, visit “Choose Your Tools for Developing and Deploying Changes“.
If a trigger already exists, check that all the required types of operations are in place and save the trigger.
11. Update trigger status: Once the trigger is configured for the desired object, the “Set a Trigger” status will be changed to the number of fields included for scanning in the Select Objects modal.
12. Test URL scanning: Now you are ready to test scanning URLs for the custom object.
13. Enable Click-time protection: As Click-time protection is enabled for the two fields selected, the malicious URL is replaced with CTP links.
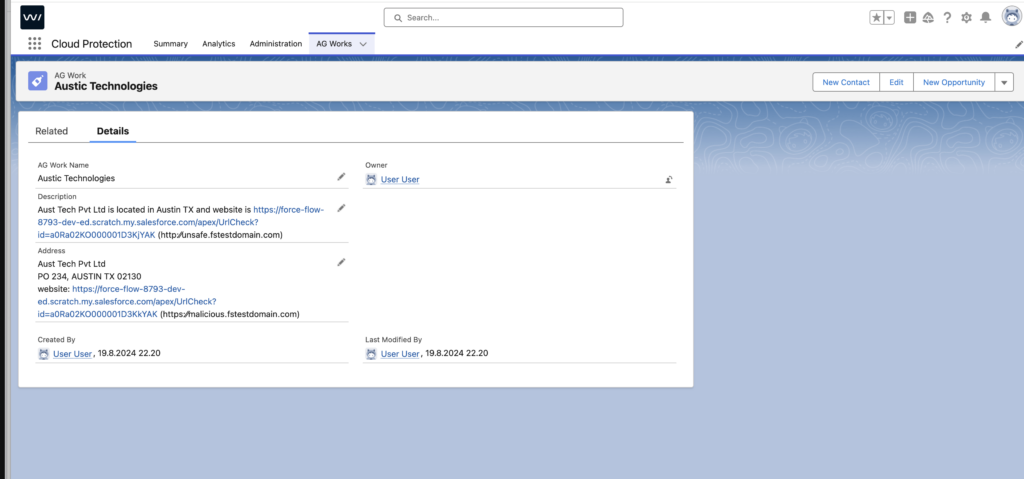
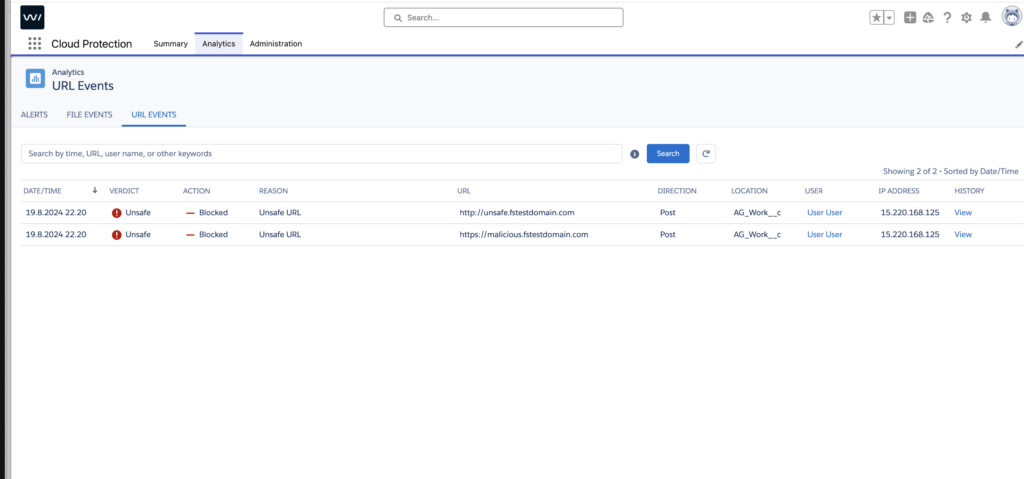
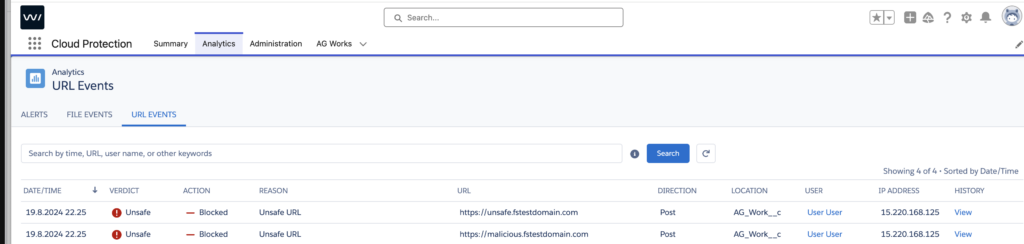
14. Report events: The malicious URL events are reported under the Analytics section.
15. Disable Click-time protection for a field: Let’s take the case of disabling Click-time protection for one of the selected fields in the object.
16. Test URL scanning again: Now you are ready to test scanning URLs for the custom object again.
17. Check Click-time protection status: As Click-time protection is disabled for one of the two fields selected, the malicious URL is replaced with CTP links for one field and not for the other field.
18. Report events again: The malicious URL events are reported under the Analytics section.
19. Remove an object from URL scanning: To remove any object from URL scanning, go to the “Select Objects” modal, click on the gear icon, and click on “Remove Object”.